
***Note for the Quilting Police - I am famous around these parts for breaking all the quilting rules and I have a note from my mother which lets me do this. So you can just all back off. Yes, you. I'm looking at you.***
I'm not going to show you how to do half square triangles (HST) because there are enough other tutorials on the web and we don't need another one. Personally I like making mine 8 at a time because it's fast, accurate and I live to trim off the dog ears (not really - you'll note in the photos below I haven't done that yet - later. When I trim the blocks down once and for all.)
Step 1.
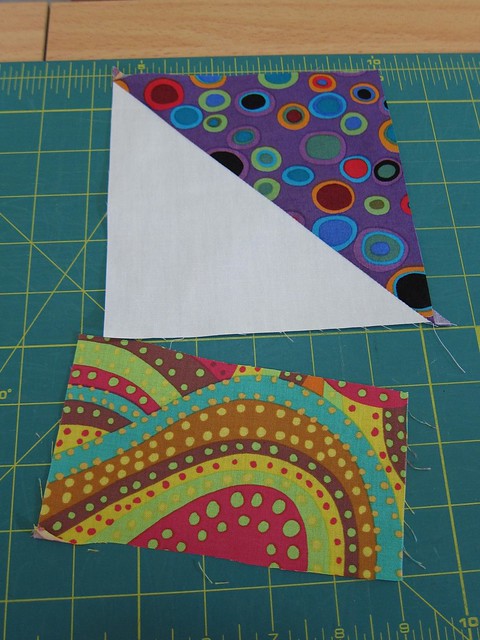
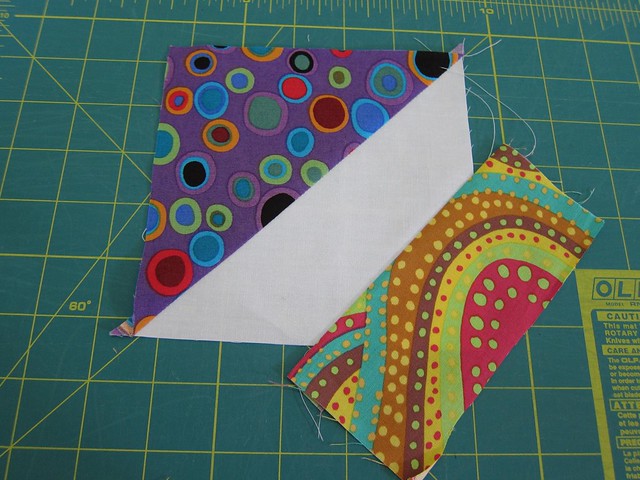
Take a HST block and a scrap of fabric. Make sure the scrap is big enough for what you want to do with it. You can find out if it will be big enough by following step 2.
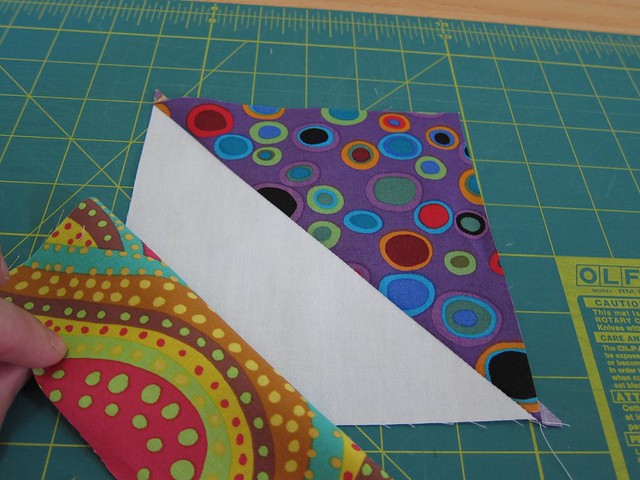
Step 2.

Put right sides together on the triangle side you want the wonky scrap to appear on. for my quilt, it's always on the white triangle. Visualise where you want the seam to go, and make sure the scrap is wide enough to allow the seam to go from end to end. If it doesn't fit, move the scrap around until it does. I don't bother with bias (gasp!) and the whole point of this stitch and flip business is to embrace the wonk. Angles, different directions, smaller sizes - it doesn't matter. Just do what you need to do to make it fit.
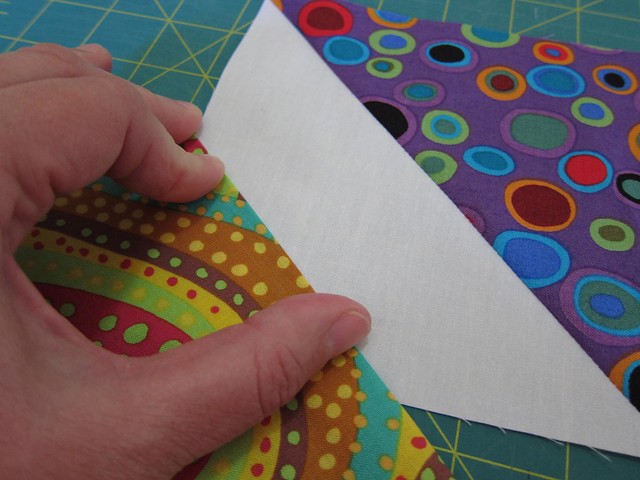
Step 3.
Roll the fabric back so you can be sure the fabric covers that bottom corner.
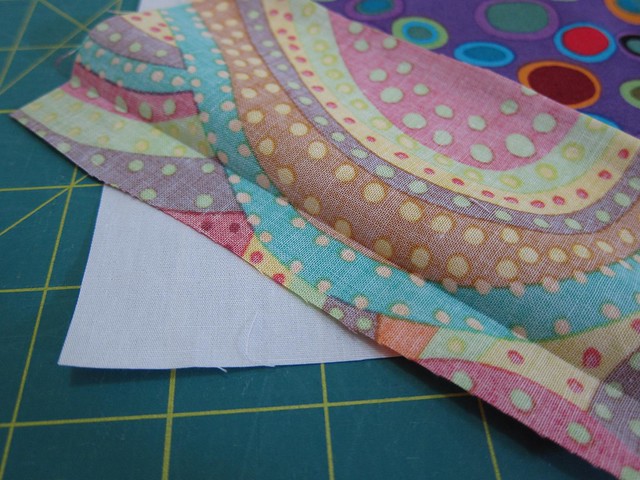
Step 4.
This part is important. When you are sure it's going to definitely fit, finger press the seam line.
Step 5.
Without upsetting the placement of the scrap, flip the scrap back so you can see the crease line. This is the line you are going to stitch on. Carefully pin to secure, or just carry carefully to the sewing machine. I'm clumsy, so I pin. Just one does the trick.
Step 6.
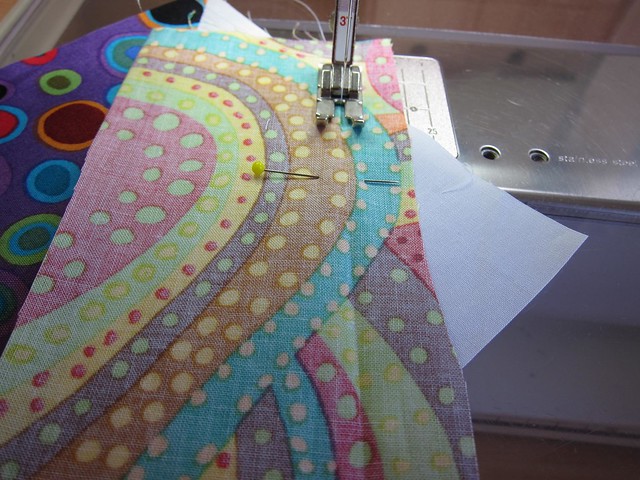
With the scrap side on top, stitch carefully along the crease line.
Step 7.
On a cutting board, and with the stitched scrap flipped back over to be upwards facing again, finger press the seam again. I usually trim those two layers from underneath with scissors, but in these photos I didn't. Everyone likes to do things their own way, and as I'm all about breaking the rules, I'll let you do whatever you like.
Step 8.
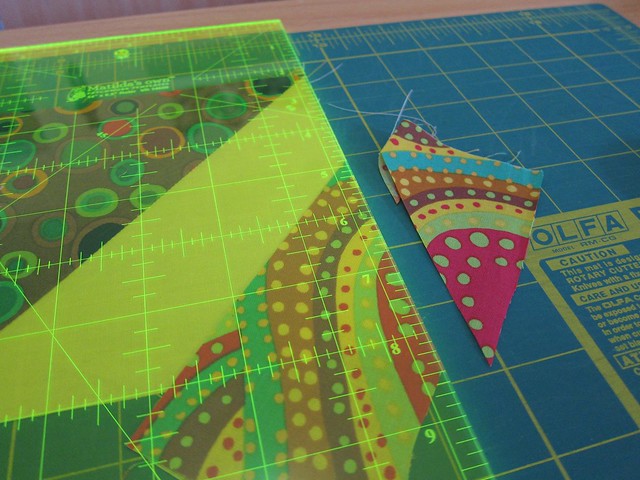
Get a ruler, line it up against your HST measurement (mine are 5.5 inch unfinished) and trim the scrappy section on both sides.
Step 9.

Admire your lovely trimmed block (except for those pesky dog ears which I will deal with later).
Step 10.
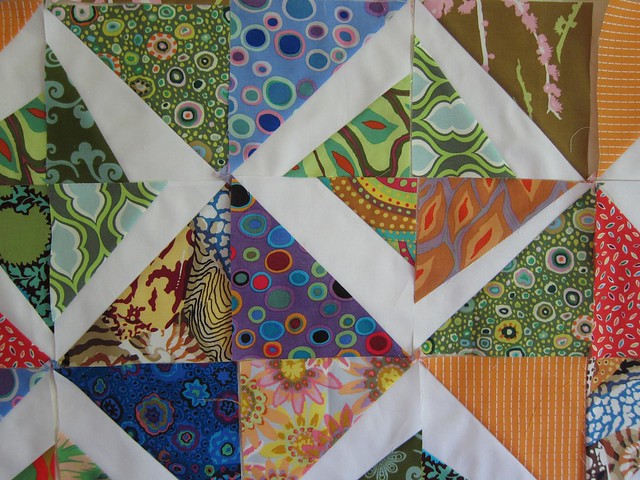
Add your new block to the design wall with its HST buddies.
So easy!
Great effect - thanks for the tute!
ReplyDeleteBrilliant! Thank you :-) (glad you have a note from yr Mum and can tell the quilt police to bog off.)
ReplyDeletegreat tutorial.. I just bought the quilting modern book and there was stich and flip technique.. I can't w ait to try.. especially after seeing how beautiful yours turn out..
ReplyDeleteawesome. you tell those quilt police what's what!
ReplyDeleteSuch a fun block with scraps;)
ReplyDelete