Wednesday, April 30, 2008
Orange
I thought a hot chocolate while sitting outside in the cold might help. It didn't.
Today was the hard close for departmental finances. I think this fact might have made things worse...
And I didn't even feel like cooking when I got home tonight.
For more orange, head over here. I'll join you there the moment the drugs start working. Tomorrow.
Tuesday, April 29, 2008
This is more than a haircut I'm wearing on my head
So I went for this. Plus crochet works up quick. If it went pear-shaped I would find out quickly, right?
Oh, dear readers. I only wish I'd taken a photo when I tried it on. I pushed, and I prodded, and I pulled, but a slouchy hat it would not become. In fact, it looked rather like this:
Which then made me go like this:
Yes, I do have a huge noggin but that shouldn't have mattered. The sizing was right. What a disaster. I think my freshly-cut spiky hair wasn't helping either - it was acting as a prop and stopping it from getting all sloppy and beret-like.
Back to the drawing board.
Monday, April 28, 2008
Sunday, April 27, 2008
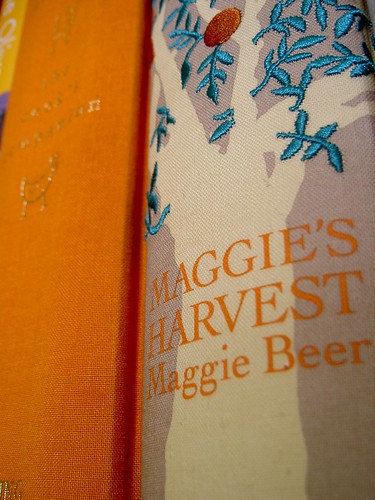
This is ... my favourite book
I suspect the fact that I grew up in Queensland under a Bjelke-Petersen dictatorship is the reason I never read this book at school.
When I first met Mr QM he told me about "The Catcher in the Rye" and what a great book it was. Then he loaned it to me. We hadn't even gone on our first date yet. A few days later I went on holidays to Sydney with my mum and the poor bugger was dropping by my desk at work each day to find out if I liked the book as much as he did. Except I wasn't there and he didn't know why.
Meanwhile, I was reading this book and loving it, and falling in love with the fella who loaned it to me, and also wondering whether he would ever ask me out.
The rest is history. Almost 14 years later we now have two copies of the book, as he gave me my own copy the first Christmas we were together.
I think it deserves another read, don't you?
So this is my favourite book. Not just because it's a bloody good read, but because it's how Mr QM and I first fell in love.
Saturday, April 26, 2008
Tutorial - brooch keeper
A couple of weeks ago I made a brooch keeper. As promised, here is a tutorial so you can make one for your own collection of brooches. It is designed for holding and protecting your precious brooches, both at home and while travelling.
If you are experienced at quilting, you will find making this a walk in the park. It took me a couple of hours to make all up, but I was also designing it and writing notes as I went along. If you only have a little sewing experience you might find it a little harder, but I'm all for having a go! It's not a great deal of fabric, so give it a try and if you stuff up, it's no great loss. Just get back in there and have another go!
Most importantly, have fun. I did!
And as with all instructions, please read them first before launching head first into it.
What you'll need:
* Main fabric and lining- cotton canvas or something equally sturdy, like upholstery fabric.
* Batting - A scrap piece will do, nothing too lofty. I used 60/40 wool blend, but you could also use pellon.
* Sleeve - Wool blend felt
* Binding - Contrasting patchwork cotton fabric
* Thread - 100% cotton (because I don't like my thread to melt when I'm ironing it). You will need one thread for quilting (cream), one for the binding (black) and one for the felt sleeve (maroon). If you want to use the one colour, that's up to you.
* Sewing machine
* Sharp jeans/denim machine sewing needle
* Safety pins
* Hand sewing needle
* Scissors
* Removable fabric marker - usually removable by ironing or water (check instructions first)
Optional
* Walking foot - much easier for stitching your layers of fabric, as it means your fabric and batting won't be shifting around. But because the project is small you could get away with using a normal foot.
* Cutting mat and ruler
* Rotary cutter
1. Cut:
From the main fabric and lining - 2 pieces, each 10.5" wide and 11.5" high (you need to consider this if your fabric is directional. Basically, the cover is taller than it is wide before it's folded over).
From the batting - 1 piece 10.5" x 11.5"
From the felt - 1 piece 9.5" x 10.5"
2. Along the longer side of the outer fabric, make a mark at halfway (i.e. 5.75"). Do this on the other long side as well.
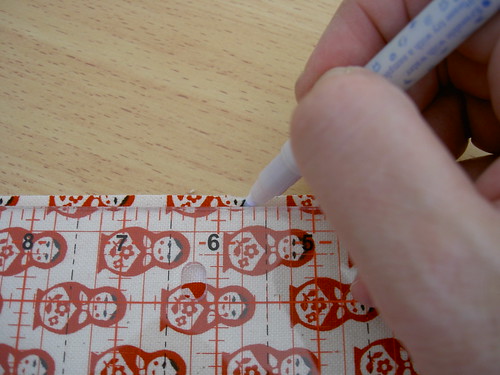
3. Draw a line using these marks as indicators. You will stitch along this line shortly, but not yet!
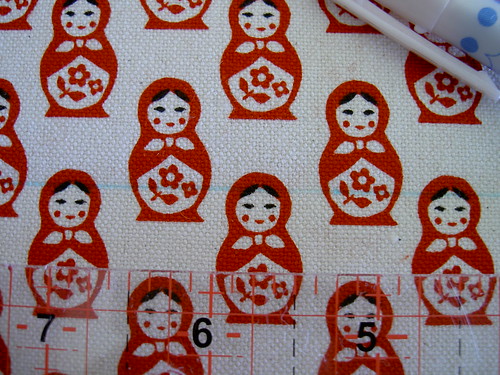
4. Layer the outer fabric, batting and lining, with the batting touching the wrong sides of both the outer and lining. This is the quilt sandwich. Make sure the fabric is perfectly layered, flat and even.
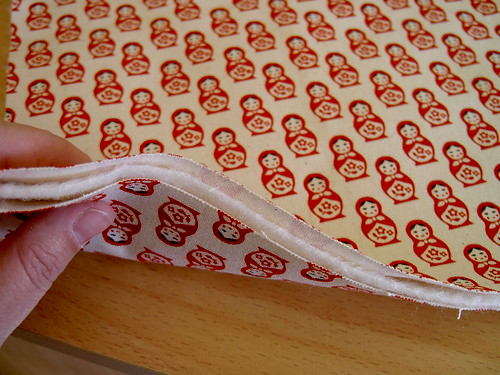
5. Using your safety pins, very carefully pin the quilt sandwich through all layers. Be really careful not to move your layers away from each other, and be careful of puckers as well. Try not to pin near the line you've just drawn, although it doesn't matter too much if you do.
6. Put your walking foot on your machine, and stitch along your marked line. Be careful of your pins. Take them out of the quilt before you run over them with your machine (do I sound like the voice of experience? I wonder why.)
7. When you get to the end of the line, trim your threads. Then stitch another two (2) lines on either side of the original marked line. A couple of millimetres should do it. I usually eyeball the distance, and use my sewing machine foot to work out the distances. These lines will be the fold line for your brooch keeper.
8. On either side of the fold line, quilt as desired. I know - I've always hated when instructions have told me that too. I quilted rectangular shapes, but you could quilt swirls, or flowers, or spirals or vertical lines. You can hand quilt, or use sashiko thread and use big stitches. The most important thing to remember is that this quilting is just being used to keep those layers together, plus it can look pretty. Ensure you don't quilt over the top of your fold line, and make sure you remove those pins as you go!
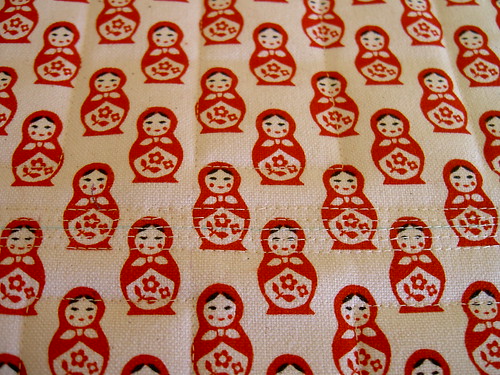
9. Double check that your layers haven't shifted. If there are some threads or a little unevenness, now is the time to trim the edges a little.
10. This is the step where you bind your quilt sandwich, and the last step before this thing stops looking like a quilt, and starts looking like a brooch keeper!
I'm not going to show you how to do the binding. Go here instead - it's an excellent tutorial. And look, honestly, there are countless tuts on YouTube which can show you quilt binding much better than I could ever hope to. I'll wait here while you master the technique.
11.Once you've sewn your binding, it's time for a little trick. Fold your quilt in half along that fold line you sewed earlier. Nifty, huh? Now you've seen how the fold works and which side you want the front of the brooch keeper to be (important to know if you have a directional fabric), open it back out again.
Fold your felt in half along the longest edge and pin the two halves together so that they are even.
The felt sleeve should be just a tad smaller than the outer layers. If it's bigger, then you've folded your felt the wrong way. Try again!
12. Stitch the fold of the felt sleeve onto the lining. I used a whip stitch. Make sure you catch enough of the felt so that it doesn't rip and fall out of the brooch keeper!
13. Once you've sewn the felt sleeve in, pin your brooches to the sleeve, fold the felt over the top of your brooches to keep them warm safe (see first photo in this tutorial), and close your brooch keeper.
And there you have it!
Wednesday, April 23, 2008
I'm back on the top again
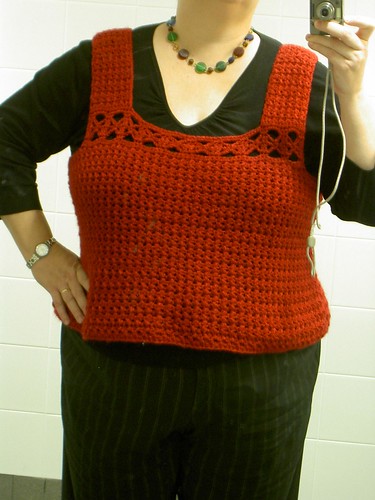
People, the Preppy Tank is done. Finished. Worn. Beautiful. Too bad about those bags under my eyes.
Pattern: Preppy Tank from Crochet Today.
Yarn: Patons Zhivago in Rhubarb. I used the "old" Zhivago - you know, the soft and luscious one that Patons made before they put out their current scratchy crap they call Zhivago. I have to thank a fellow Raveller for the extra yarn when I didn't have enough of the soft stuff to finish the project.
Hook: 6.5 mm, 6 mm, 5.5 mm
Notes: This is the first garment I've made that's not a shawl or wrap or socks. It is really nice to wear and I like the length, but I'm not too sure how much I love the bulk around the waist.
Sunday, April 20, 2008
This is ... my latest discovery
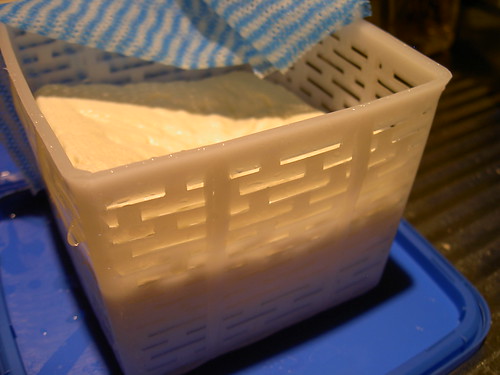
I thought it might be a disaster, or it would go rancid before I got to eat it. And even though I doubted my greek yoghurt and persian/gourmet fetta making abilities due to their general runniness while they were setting overnight, I've just put them through cheesecloth (AKA Chux Superwipes) and they look and taste good too!
So hi, my name's Michelle. I quilt, crochet, sew, cook AND MAKE CHEESE. Pleased to meet you!
Saturday, April 19, 2008
Big cheese make me
It was heaps of fun, quite relaxing and I made fetta!
Our little trip to Melbourne was, as expected, four days of fantastic fun. I spent time with friends, including our Thornberry (who not only invited me over to her house, but made me coffee, fed me lunch and then showed me her truly amazing sewing room with views of the city. Thanks again Lara!). Sadly Christina got super busy moving house so we couldn't meet, but I still managed to do fabric shopping for Australia, as well as visit Meet Me At Mikes and the Rose St Artist Markets.
The most insane thing that happened to me was that I was asked five times on Monday for directions, like I was a local. I'm not too sure what part of me wasn't screaming out "Hello! I'm from Canberra via North Queensland!" but there you go. Just as odd was the fact that I could actually tell these people which tram stop to get off and which direction Johnston St was.
Since we returned to Canberra I've been laying low. I've had some big decisions to make concerning my work but that's not for the blog. I've also been having fun tackling this beanie.
Pattern: Seismic by Julie Armstrong Holetz.
Yarn: Cleckheaton Country Silk 8 ply
Hook: 5.5 mm
Notes: Which parent gave me this huge noggin? Sadly, this hat is too tight, but I will make another with a bigger hook and see how that goes.
Friday, April 11, 2008
Within myself there a million things
On drawing out this name ...
... he said "Oh, this is going to look SO RIGGED!"
Well done to the lovely Bells! I'll give you your prize when I next see you. Take your pick of flower brooch - other colours also available on request. I'm addicted to making them and I just. can't. stop.
Mr QM also drew out two more names for a consolation prize.
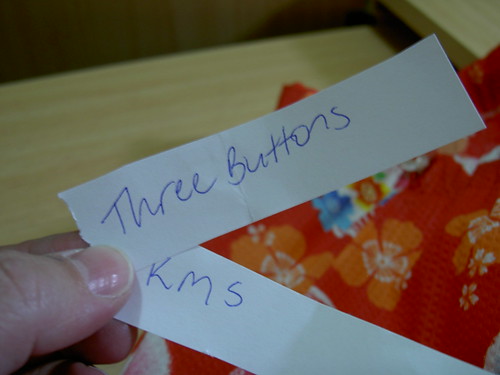
Congratulations to Three Buttons and kms! If you send me an email (quiltingmick~butremovethisrubbishfirstOK?@gmail.com) with your mailing address, I will send off a little something to you as well.
Tomorrow morning we are flying to Melbourne for four days of shopping, friends, footy and culture. I'll be alone for two days while Mr QM travels to Bendigo, but I'll be keeping myself busy and hopefully I'll be catching up with the wonderful Thornberry. We've been each others' biggest blog stalkers for so long, it will be nice to finally meet! I'm also going FABRIC SHOPPING with Christina, and personally I am so excited I can't help but put FABRIC SHOPPING in capital letters.
Sunday, April 6, 2008
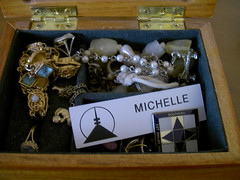
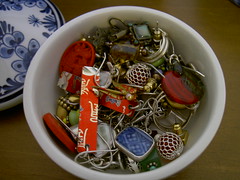
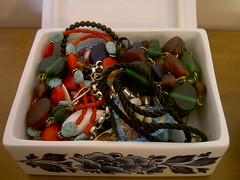
This is ... my knick knack/jewellery box
The three Delft Blue boxes were bought in Delft by both Patricia and my mum. Delft Blue has always held a big place in my heart as my Oma collected it and always promised she would leave it to me. Unfortunately her neighbours raided her house after she passed, so I never did see her Delft Blue again.
Luckily for family and friends, huh?
Clockwise from top left (click to get the bigger photos on Flickr)
1. Necklaces
2. Necklaces
3. Earrings
4. Knick knacks and sentimental stuff. Like my Canberra Quilters and SCQuilters badges, an old faux gold, turquoise and pearl bracelet that was mum's, a charm bracelet mum had as a child, and a charm bracelet of San Francisco icons I bought in February 1981 when I was 11.
I seem to have very eclectic tastes, don't I? Very little expensive stuff here except for the stuff people have given me, but I love everything in these little boxes.
Another superb "This is ..." meme from Three Buttons! Thanks!
Saturday, April 5, 2008
I love you in a way that makes me free
As anyone who sees me in Civic during the week can confirm, this autumn I have become the queen of brooches (and black cardis, but that is another post altogether). I've got some many brooches that I was having trouble storing them where they wouldn't get damaged. I've had an idea for a brooch keeper ratting around in my head for the last couple of weeks, so today I made it.
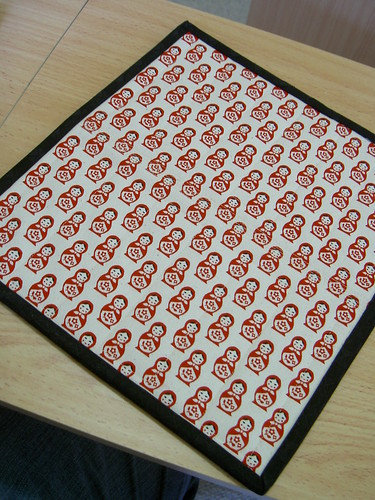
I'm really happy with it. It's sturdy and very protective, and it has matroyshkas! In red! It will store my brooches safely in my smalls drawer, and I can also take it with me when I go on holidays next week. I took photos during the process of making it, so it may become a tutorial. Who knows?
This post is my 150th. I've made some amazing friends through this blog, and to thank you all for sticking around I would like to give a present to one of you. If you comment on this post I will put you in a draw, and the winner will get a project bag and a chrysanthemum flower brooch hand made by me. I haven't made them yet, but given you have until Thursday 5pm Canberra time to post, I have plenty of time to make something.
Thursday, April 3, 2008
Billy, he'd put flowers in his hair
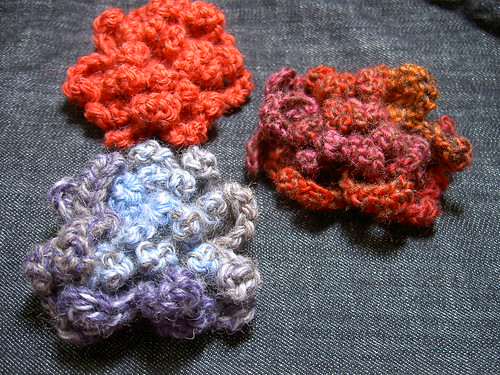
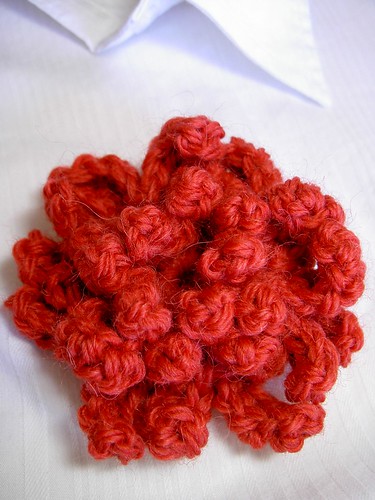
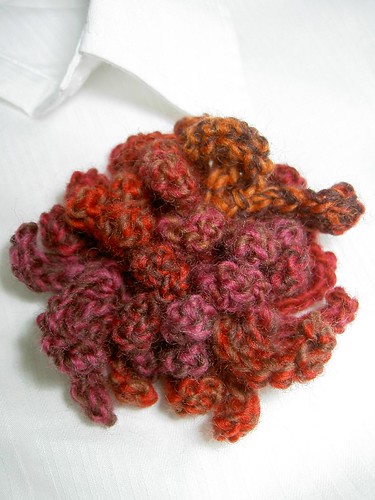
But sometimes there is a little project where, for only an hour, you have to concentrate. And concentrate. And wonder how nuts the designer was to come up with this. And then you're done.
Pattern: Large Chrysanthemum from "Crochet Inspirations" by Sasha Kagan.
Yarn: Twilley's Freedom Spirit
Hook: 4.25 mm
Notes: I'm making this into a brooch, as I'm rather fond of it. I want to experiment with bigger hooks, and different yarn. Yum.
My next post is my 150th. I'm only making a big deal of it because I totally missed my 100th; my 4 year anniversary isn't until July; and it will be years until my 200th. Stay tuned - there will be giveaways!